
STEREO VISION
Your eyes and brain work together to show the world in 3D. Most people see the two separate images inside a VR headset as a single 3D image. Like your eyes, VR presents a scene from two vantage points so you see the virtual world in 3D.
TRY THIS!
MAKE YOUR OWN STEREOSCOPE

Materials
Reading glasses (+2.5 works well)
Cardboard
Black construction paper or black fabric
Scissors
Ruler
Pencil
Tape or glue
Try it
Cut the cardboard into the three shapes shown below (parts A, B and C) using the suggested measurements. It’s ok if you’re off by a little bit.


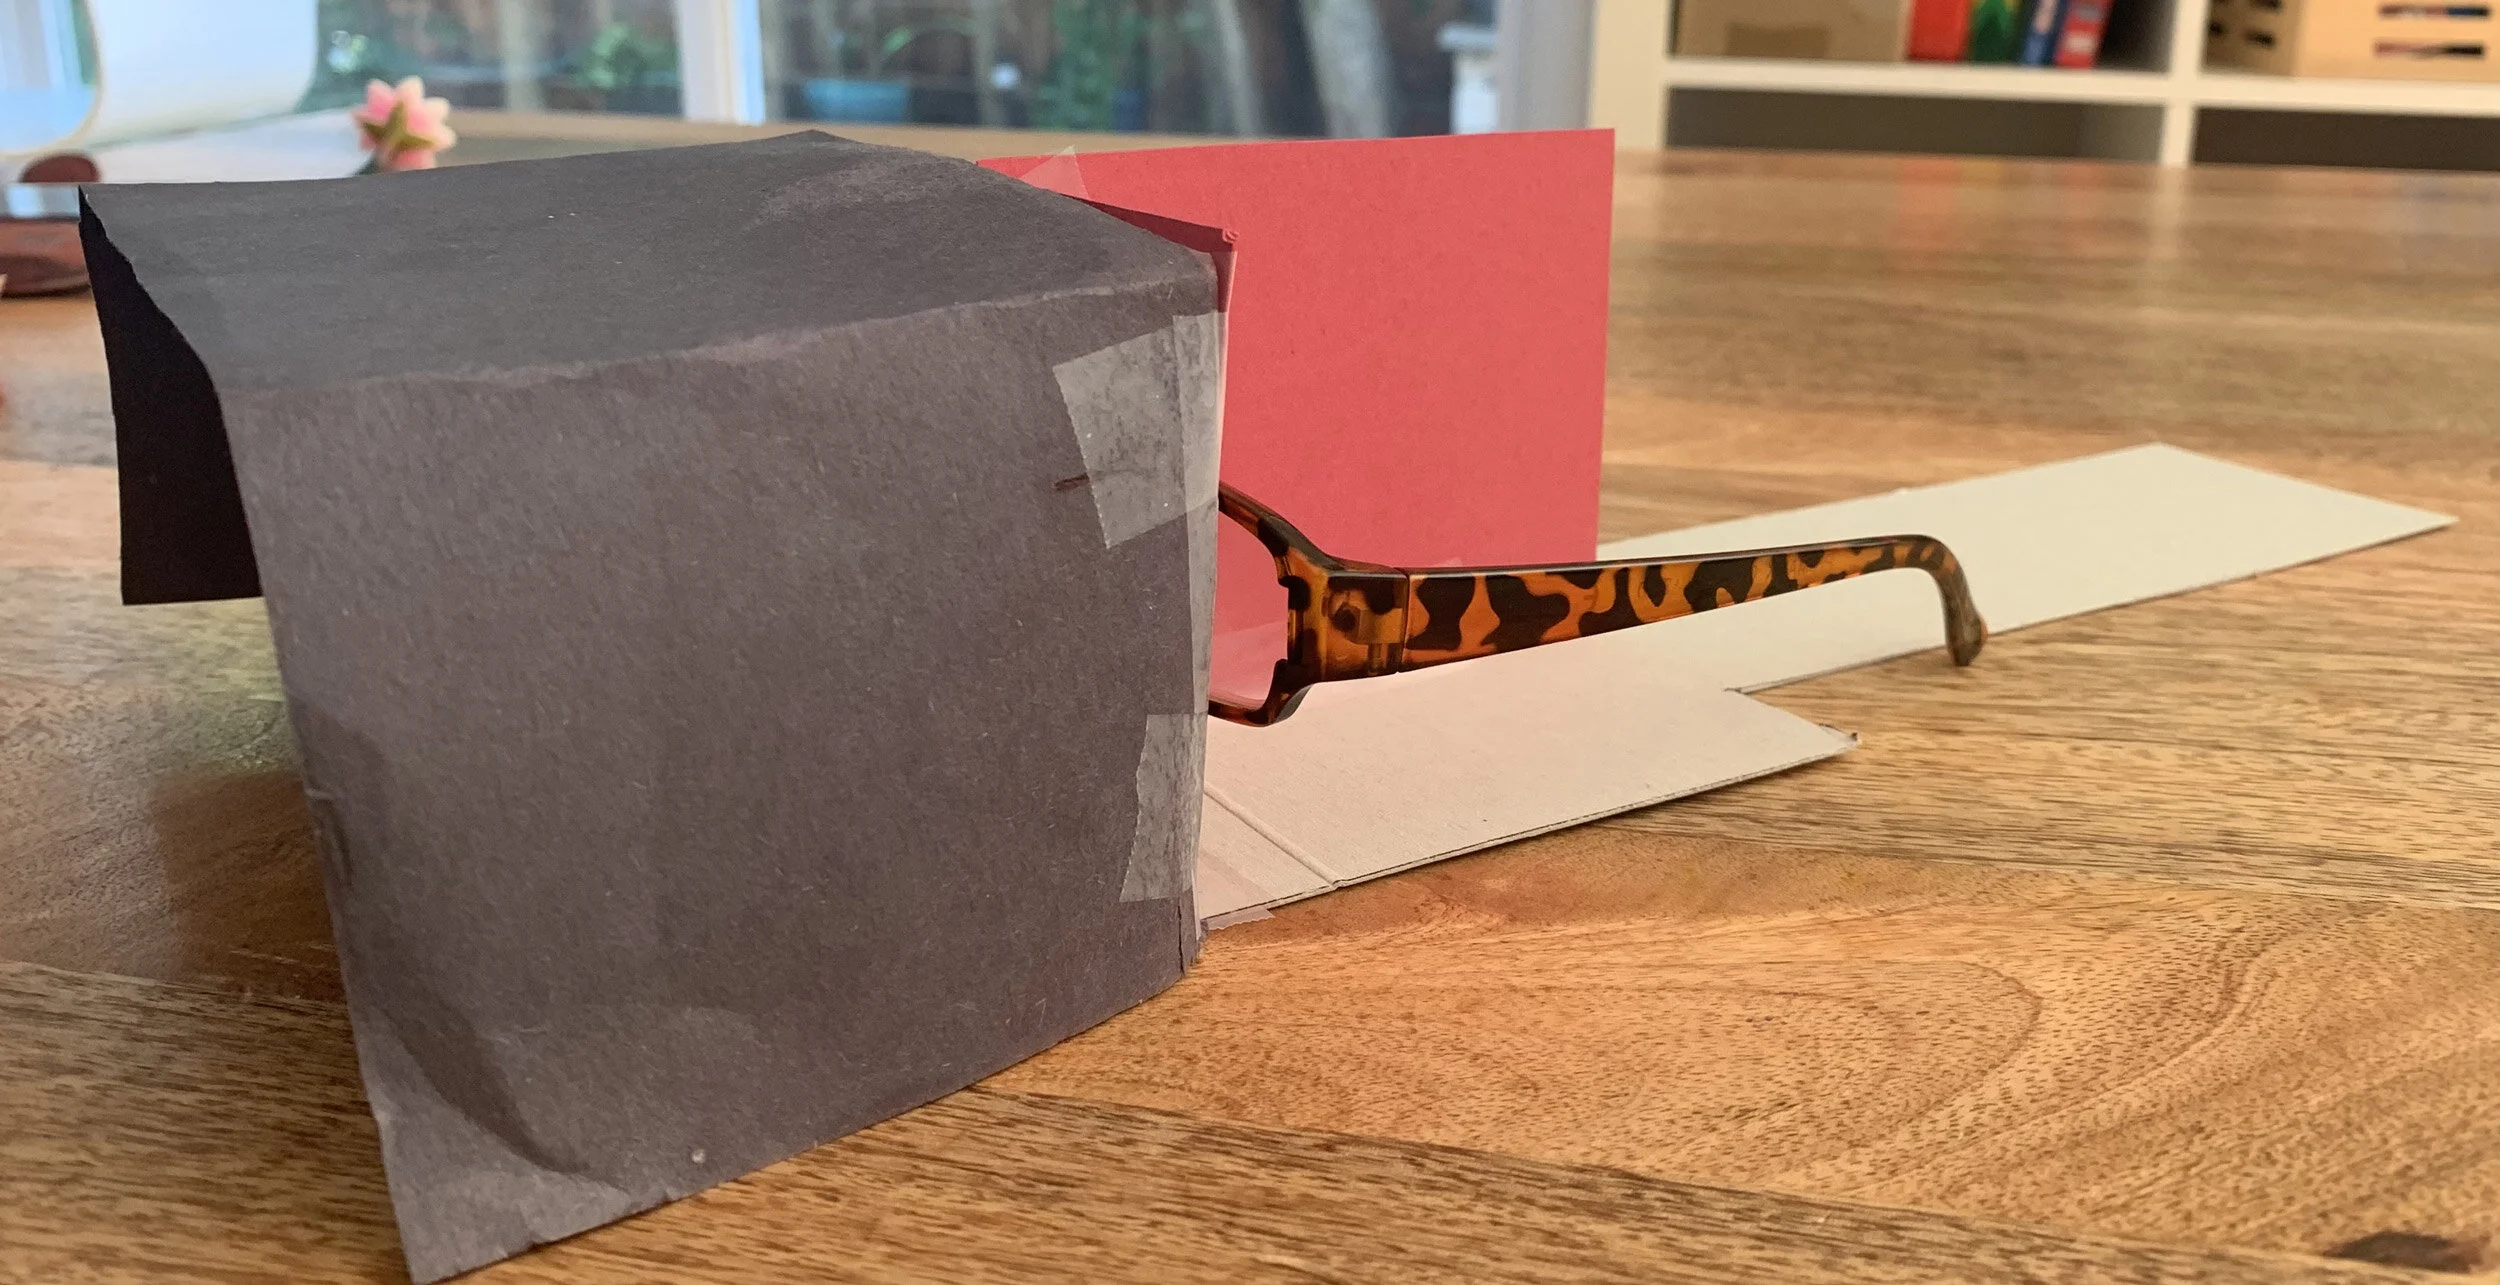
2. Once you have cut out your three pieces attach the reading glasses to Part A as shown in the photo below. Each lens will cover one of the eye holes you have already cut out.

3. Now you need to attach Part A (with the reading glasses attached) to Part B.

4. Next you need to attach Part C. As the square piece of cardboard won’t sit flush against Part A (owing to the glasses) you can cut a notch into the piece of cardboard to accommodate the bridge between the two lenses. This divider ensures that each eye sees the correct image.

5. For the final part cut a 3.5 inch by 10 inch strip of black construction paper. Curve and fold the paper over the lenses and cardboard piece with eye holes. When looking into the device, the paper should extend back from the lenses toward your face. This will help to block your peripheral vision. Glue or tape the short sides of the paper to the bottom of the cardboard frame.
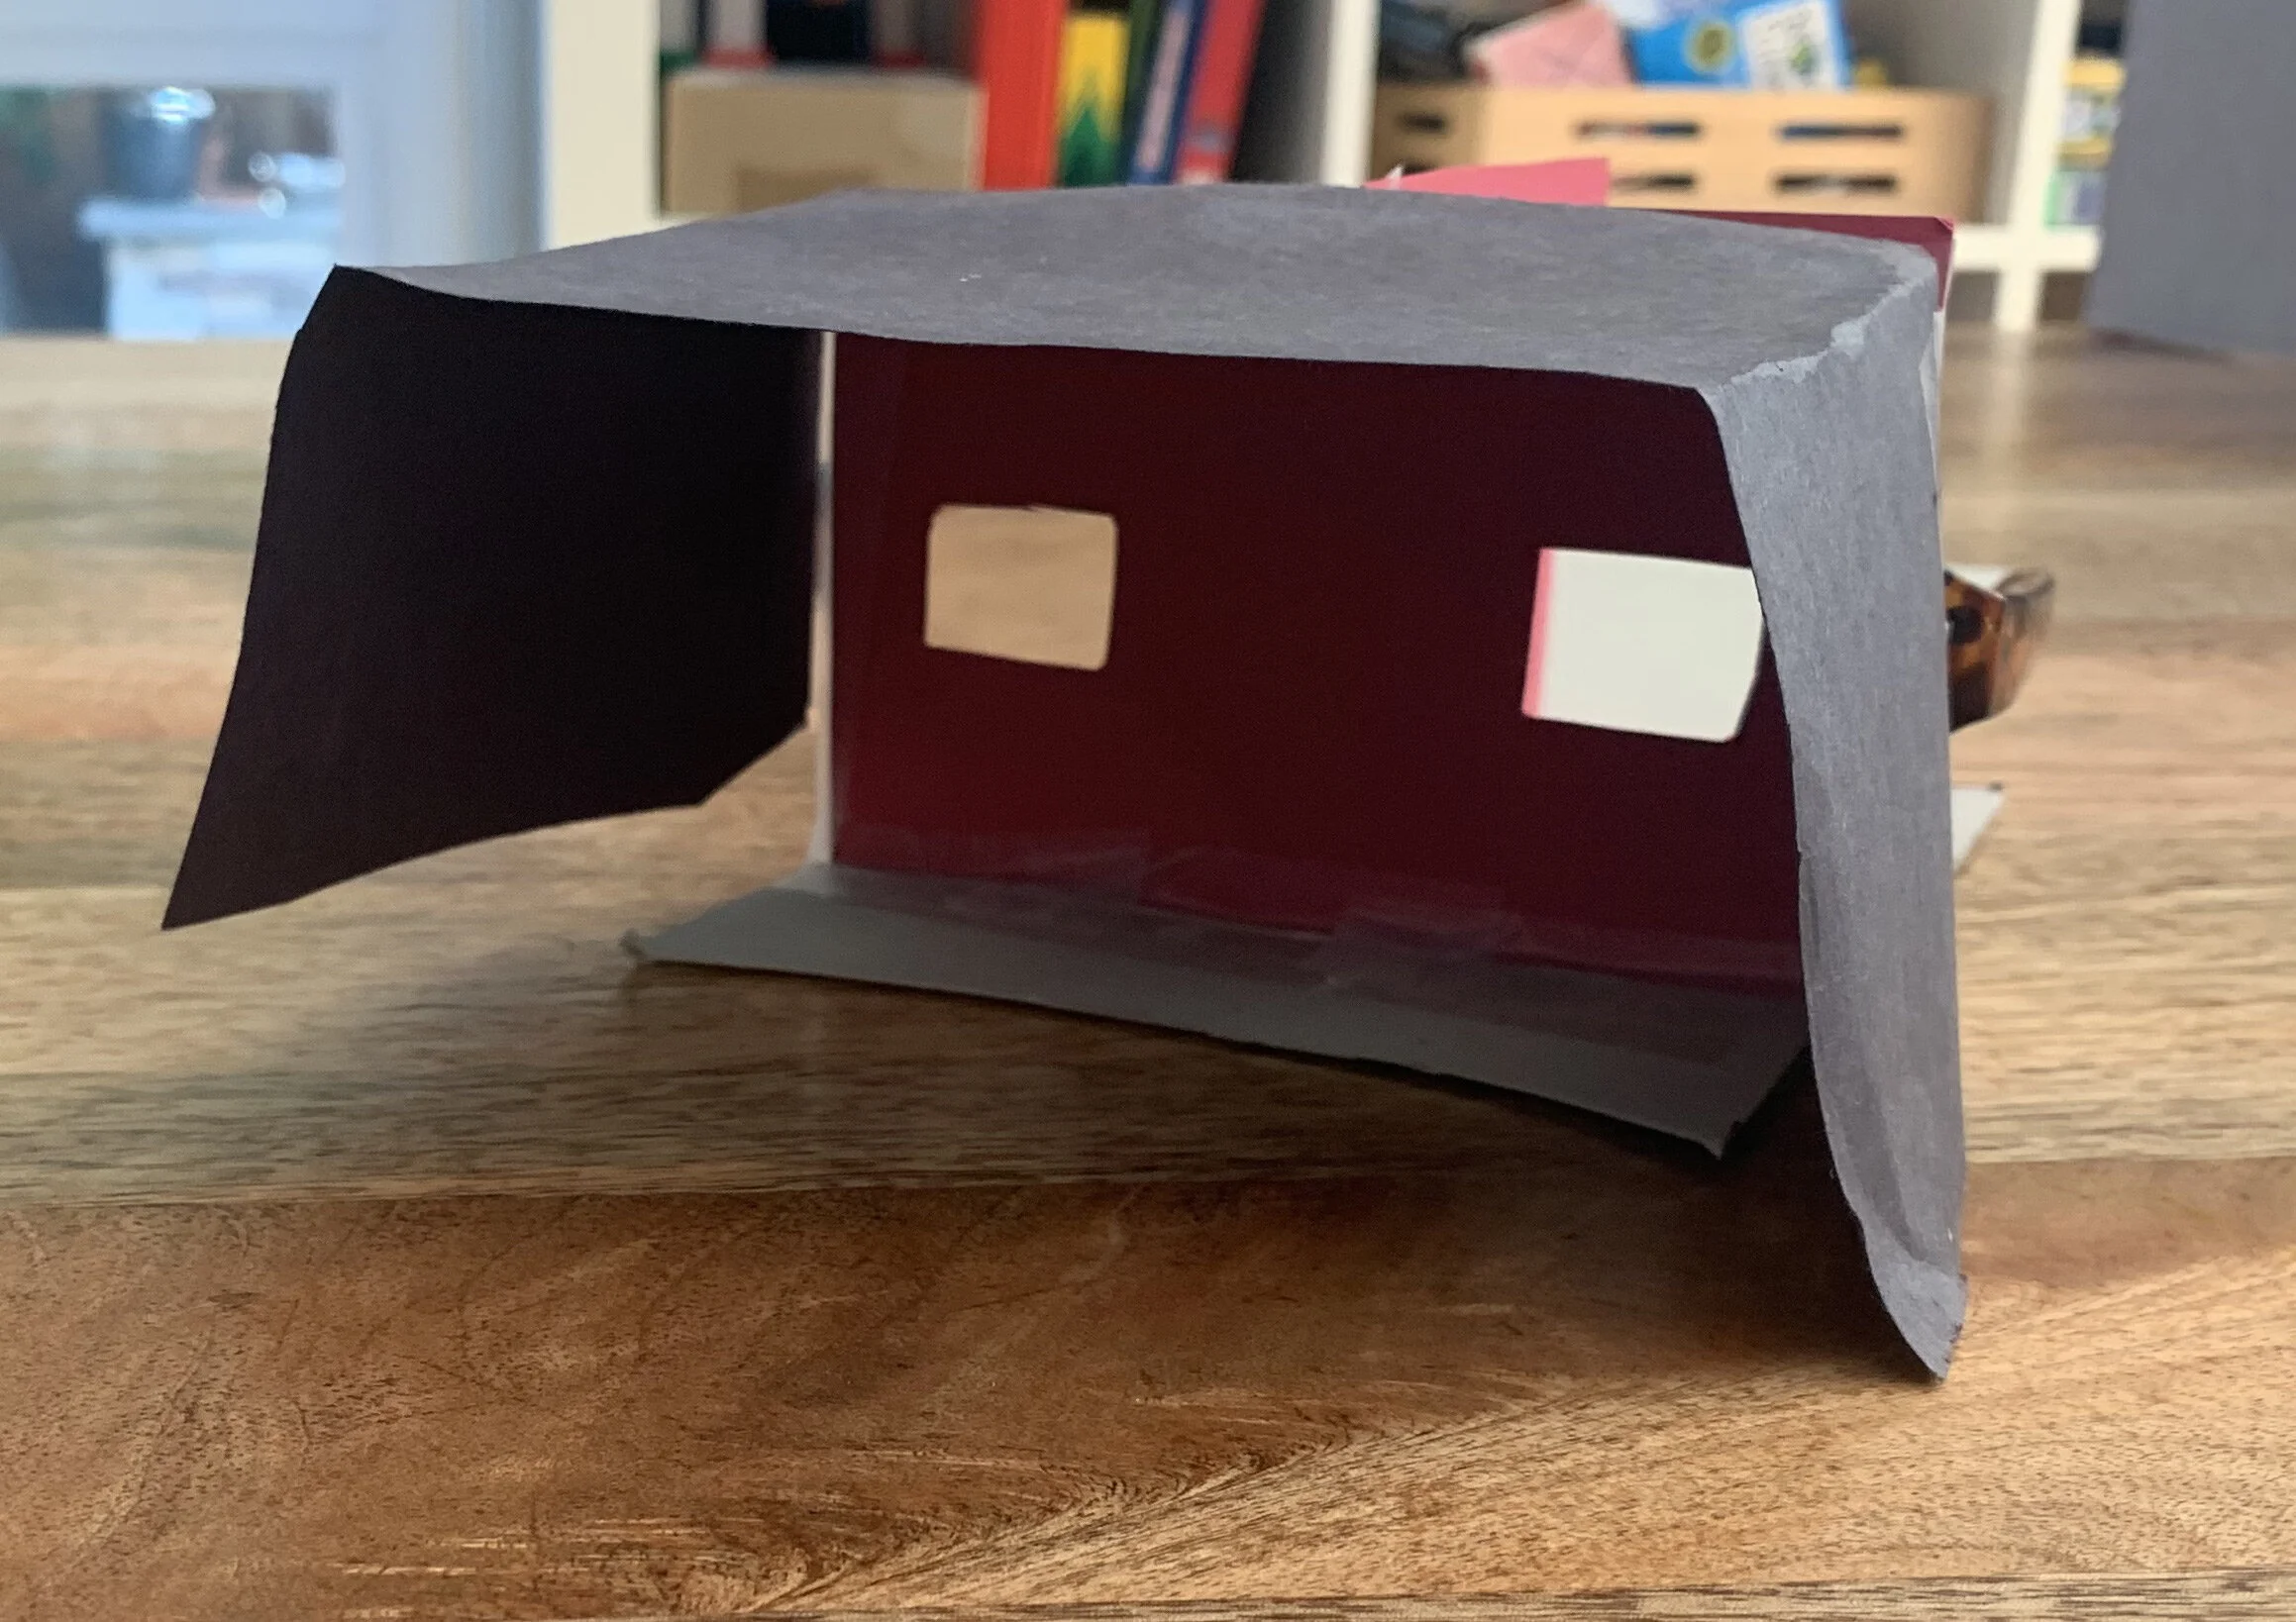
Your finished stereoscope should look something like this:
6. Now you have a stereoscope, you need to test it out! Print out the images below; each image should be approximately 3.5 inches by 3.5 inches.

Photo courtesy of Takashi Sekitani

Photo courtesy of Andrew Brooks
Another great resource for images for your stereoscope is the New York Public Library. Check out their digital collections here.
Observe it
Look through the stereoscope to see how two offset views of the same scene make one 3D image. If the magnification of the glasses is different then you may need to move the images forwards and backwards a little from the end of the cardboard until they come together.
Another tip to help focus the image is to close each eye one at a time; this ensures you've lined the images up correctly. With each eye closed you should see the left image through the left eye hole and the right image through the right eye hole.


WHAT'S GOING ON?
Your brain merges the two views into a single image and produces a 3D scene.

Virtual reality 3D animation software creates and projects a different view onto left and right display screens. Just like real life, your brain does the rest!
Invented in the 1930s, the View-Master made stereoscopes widely available and very popular.

WANT TO LEARN MORE?
All you have to do to make stereoscopic images is select an object to focus on and move your camera just slightly while you take two photographs of it. Watch more about how to make images for your homemade stereoscope here.